Making Instant Pot Yogurt - A Pictorial Recipe
I have made, and still make, yogurt every week for my family. I use to make it the old-fashioned way on the stove and fermenting in the oven overnight then into jars and into the refrigerator. It is one way to control what goes into what we eat.

I purchased a 3-quart Duo Instant Pot exclusively for making yogurt a short while ago. It makes 2 1/2 quarts at a time and that stays in the refrigerator easily for two weeks, then I make more.

I like thick yogurt as you can see from the picture above. It is thick, more like ice cream really.
I do not make the no-boil method yogurt, I stick to what I know and that is the old method I used on the stovetop. What I love about this little pot is, it does it all for me and there is only one container to deal with throughout the process.
Step one: Just put in the milk, enough to reach the max fill line ( slightly less than 2L ) into the pot--put the lid on in the venting position because we are not using pressure--and wait for it to boil the milk gently until it comes to the right temperature. Yes, I always test the milk when its done with a thermometer. I am looking for 180*

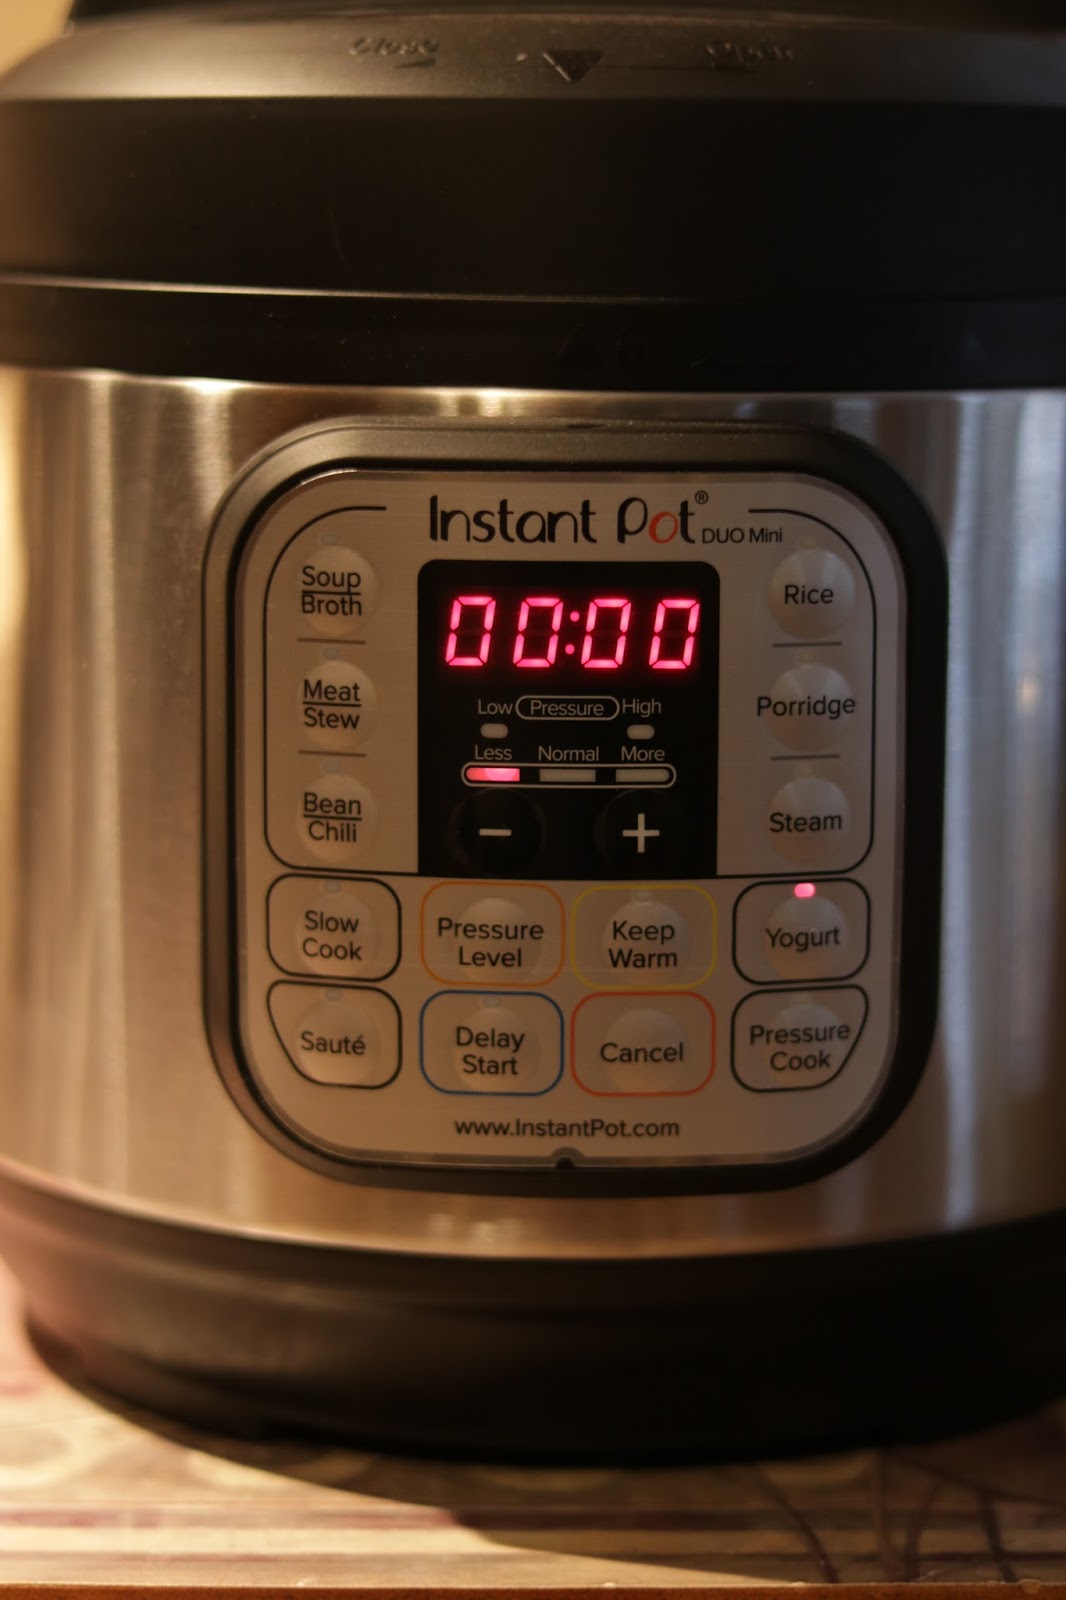
Boil the milk in the pot using the yogurt function button--push twice. Then the "boil" notification will appear, as shown below. When the boiling is complete, the machine will beep.

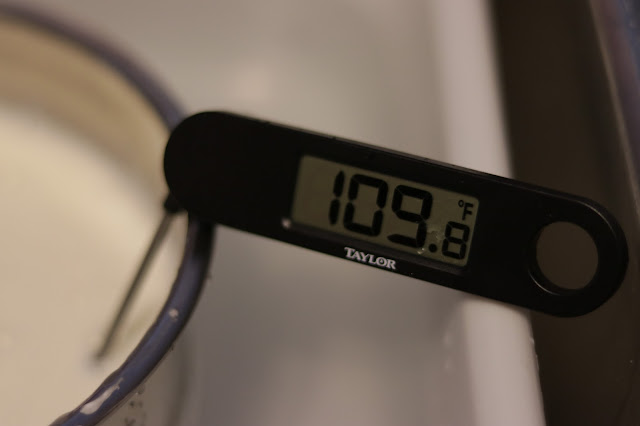
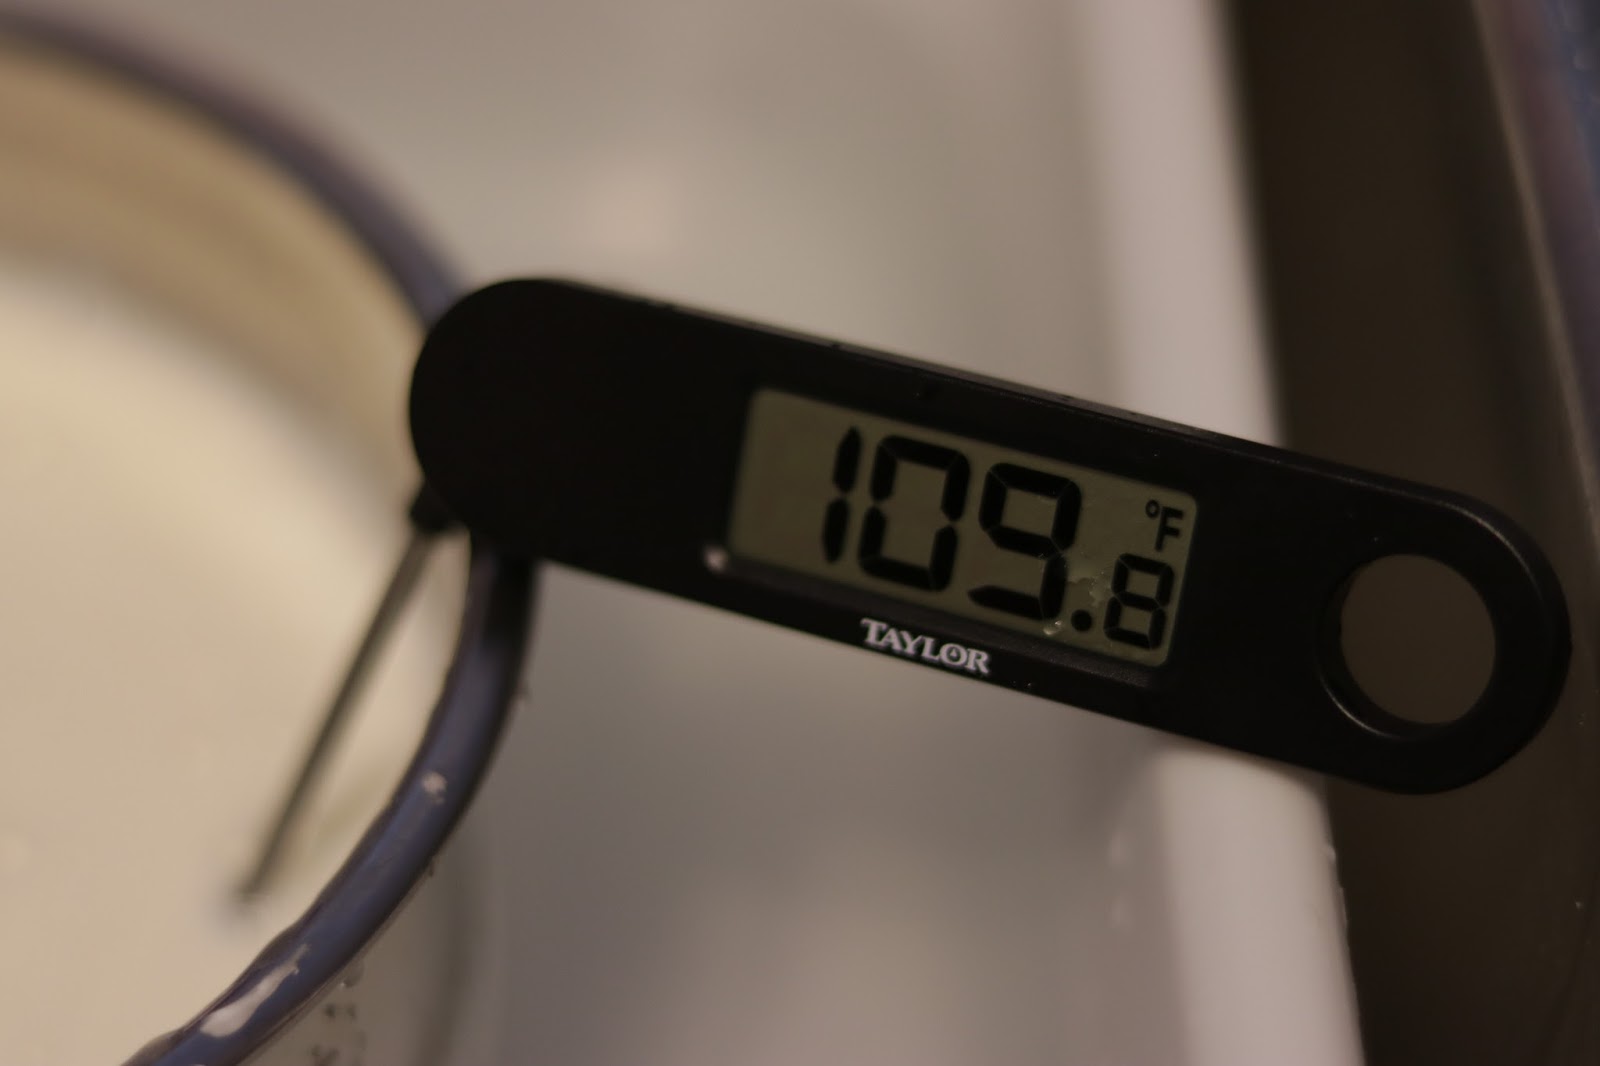
Remove the stainless steel pot and cool the milk in the sink in a small tub of cold water to bring it down to 110 *

I add one can of condensed milk and a tablespoon of vanilla extract to the warm milk at this juncture. It also helps cool the milk if I add the condensed milk after the milk is heated, not before.

I buy Oikos yogurt. It has live culture. Now, remember, you can use 1/4 cup of the old yogurt you made last time! If you remember not to eat it all. Many freeze ice cubes of their yogurt to use as their next starter. I like fresh live culture and it is easy to acquire.

I keep an eye on the temperature with a cool little thermometer from Walmart. They are not expensive. Please have one in your kitchen so you can make sure things are the correct temperature.

I usually add 1/4 cup or so of yogurt. Many suggest 2 tablespoons, I use 1/4 cup or more because I like it thick and I have found this works. I place it in a separate bowl and stir some of the half-cooled milk into it in that bowl before adding it back to the milk, which must be 110* or close to that otherwise the yogurt culture can be destroyed. You need the little fermenting warriors to get busy.
So now add the yogurt and stir. Place back in the pot, venting position, remember no pressure. I make my yogurt in the morning and let it ferment in the pot for 11 hours. You could do this overnight but I am cautious about leaving kitchen appliances on all night when I cannot watch over them.

The Genius Pot will then start the countdown and you just wait.

When the Pot beeps it is done. You remove the pot, cool on the counter or again in the sink. It is usually not hot, but I don't want a warm container in the refrigerator. So when it is ready I cover it with cling wrap and place it in the refrigerator overnight.
In the morning it will look like this:


TADA!! Now you just need to put it in smaller jars and into the fridge. Get creative, add fruit to some, add pudding, add jam, honey--I love banana, and granola is so delicious together I have it for lunch most days.
Ingredients:
1- 2 L carton of 3.25% milk - My 3-Quart takes slightly less milk once the condensed milk is added
1 small can of condensed milk - 300ml
1 tablespoon vanilla
1/4 cup live culture yogurt - or use your remaining yogurt from the last batch you made
Method: Described above.
Tell me if you like this format and I will adjust future posts to be more visual.
~ Hugs From Mum

I purchased a 3-quart Duo Instant Pot exclusively for making yogurt a short while ago. It makes 2 1/2 quarts at a time and that stays in the refrigerator easily for two weeks, then I make more.

I do not make the no-boil method yogurt, I stick to what I know and that is the old method I used on the stovetop. What I love about this little pot is, it does it all for me and there is only one container to deal with throughout the process.
Step one: Just put in the milk, enough to reach the max fill line ( slightly less than 2L ) into the pot--put the lid on in the venting position because we are not using pressure--and wait for it to boil the milk gently until it comes to the right temperature. Yes, I always test the milk when its done with a thermometer. I am looking for 180*

Boil the milk in the pot using the yogurt function button--push twice. Then the "boil" notification will appear, as shown below. When the boiling is complete, the machine will beep.

Remove the stainless steel pot and cool the milk in the sink in a small tub of cold water to bring it down to 110 *

I add one can of condensed milk and a tablespoon of vanilla extract to the warm milk at this juncture. It also helps cool the milk if I add the condensed milk after the milk is heated, not before.

I buy Oikos yogurt. It has live culture. Now, remember, you can use 1/4 cup of the old yogurt you made last time! If you remember not to eat it all. Many freeze ice cubes of their yogurt to use as their next starter. I like fresh live culture and it is easy to acquire.

I keep an eye on the temperature with a cool little thermometer from Walmart. They are not expensive. Please have one in your kitchen so you can make sure things are the correct temperature.

I usually add 1/4 cup or so of yogurt. Many suggest 2 tablespoons, I use 1/4 cup or more because I like it thick and I have found this works. I place it in a separate bowl and stir some of the half-cooled milk into it in that bowl before adding it back to the milk, which must be 110* or close to that otherwise the yogurt culture can be destroyed. You need the little fermenting warriors to get busy.
So now add the yogurt and stir. Place back in the pot, venting position, remember no pressure. I make my yogurt in the morning and let it ferment in the pot for 11 hours. You could do this overnight but I am cautious about leaving kitchen appliances on all night when I cannot watch over them.

The Genius Pot will then start the countdown and you just wait.
When the Pot beeps it is done. You remove the pot, cool on the counter or again in the sink. It is usually not hot, but I don't want a warm container in the refrigerator. So when it is ready I cover it with cling wrap and place it in the refrigerator overnight.
In the morning it will look like this:


TADA!! Now you just need to put it in smaller jars and into the fridge. Get creative, add fruit to some, add pudding, add jam, honey--I love banana, and granola is so delicious together I have it for lunch most days.
Ingredients:
1- 2 L carton of 3.25% milk - My 3-Quart takes slightly less milk once the condensed milk is added
1 small can of condensed milk - 300ml
1 tablespoon vanilla
1/4 cup live culture yogurt - or use your remaining yogurt from the last batch you made
Method: Described above.
Tell me if you like this format and I will adjust future posts to be more visual.
~ Hugs From Mum


Comments
Post a Comment